Whether you’re an avid gardener with a surplus of fruits and vegetables, a bargain-hunter who loves buying produce in bulk, or simply a food lover desiring to retain the flavors of the season year-round, learning to can and preserve fresh produce is an invaluable skill. This technique not only reduces food waste but also ensures you have a pantry full of flavorful, nutrient-rich food ready at your fingertips. Here’s a basic introduction to the art and science of canning and preserving fresh produce.
Understanding Canning and Preservation
Canning and preservation are processes used to extend the shelf life of food. These techniques involve the use of heat to kill or weaken dangerous microorganisms that cause food spoilage. Food is typically placed in a can, jar, or other containers before being heated to destroy any pathogens and create a vacuum seal that prevents new ones from entering and spoiling the food. Two common methods of home canning are water bath canning and pressure canning.
1. Water Bath Canning
Water bath canning is an excellent method for preserving high-acid foods such as tomatoes, fruits, jams, jellies, pickles, and salsas. This process involves filling jars with food, applying lids, and then boiling the jars in a large pot of water for a specific amount of time.
2. Pressure Canning
Pressure canning is required for low-acid foods like vegetables, meats, poultry, and seafood. This process involves placing food-filled jars into a pressure canner that uses heat to create steam and build pressure. This enables the canner to reach temperatures above boiling point, necessary for safely preserving low-acid foods.
Steps to Can and Preserve Fresh Produce
Step 1: Choose and Prepare Your Produce
Start with fresh, ripe, and high-quality produce. The quality of your preserved food will only be as good as the ingredients you start with. Wash your produce thoroughly to remove any dirt or pesticides. Depending on what you’re preserving, you may need to peel, chop, or cook your produce.
Step 2: Choose Your Jars and Lids
Use jars manufactured specifically for canning to ensure they can withstand the heat. Lids should be new to ensure a good seal, while bands can be reused as long as they’re not rusted or bent.
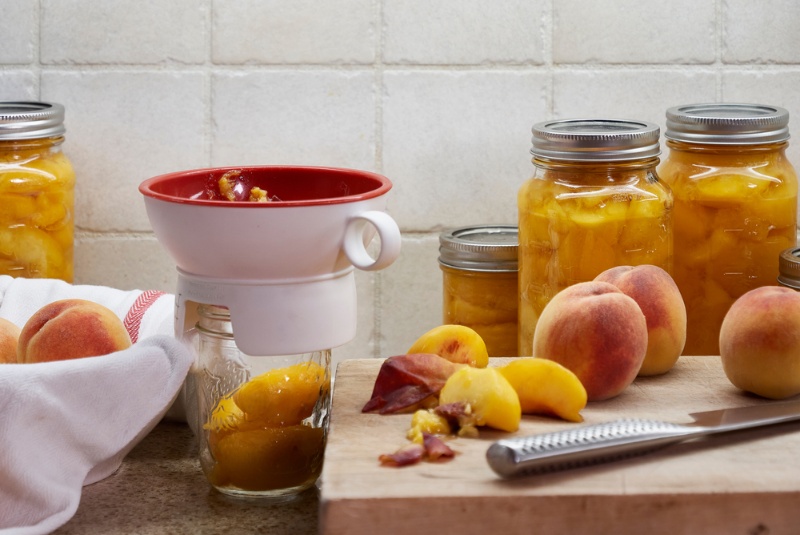
Step 3: Fill Your Jars
Different foods require different headspaces, which is the space between the top of the food and the top of the jar. A funnel can help to fill the jars cleanly. After filling, use a non-metallic tool to remove air bubbles.
Step 4: Apply Lids and Process Jars
Wipe the rim of the jar clean before placing the lid on top and screwing the band on just until fingertip tight. Then, place the jars in the canner. Once all jars are in the canner, you can start the processing time according to a trusted recipe.
Step 5: Cool and Store
After processing, remove the jars from the canner and let them cool on a towel or cooling rack, undisturbed, for 12-24 hours. Check the seal, label your jars, and store them in a cool, dark place.
Step 6: Enjoy Your Preserved Food
When ready, crack open a jar and enjoy the fruits (or vegetables) of your labor!
Canning and preserving fresh produce can seem daunting at first, but like any new skill, practice and patience make perfect. Start with a simple recipe, follow tested guidelines, and you’ll soon be rewarded with the rich, vibrant flavors of your favorite produce any time of year. In essence, canning and preserving is a delicious form of time travel, capturing the summer’s sun-ripened bounty, or the crisp flavors of autumn, all ready for you to savor throughout the year. So, why not harness the seasons? Your pantry and your palate will thank you.